Nav Bar

Showing posts with label Crafts. Show all posts

Tuesday, March 11, 2014

No-Sew Fabric Embroidery Hoops

We moved into a new house a little over a year ago, and were blessed with much more space.  Included in this extra space was a laundry room (and an amazing washer/dryer set...props to my hubby & our realtor for good negotiation skills!) filled with natural light.  I loved the clean feel of the room, but noticed that it needed a little pop of color.  I always enjoy browsing the beautiful fabrics at the store, but I can {barely} sew.  Enter in my no-sew fabric embroidery hoops!

These fun fabrics came from Walmart...who knew?

Materials needed: fabric, embroidery hoops of assorted sizes, scissors, hot glue gun

First, iron the material nice and flat.

Next, place the material in the embroidery hoop, making sure that it is even and that your material is centered where you want it.  Tighten the hoop with the screw, and pull the material, stretching it a little so that it is taut in the hoop.
Lastly, tack down the material to the back of the embroidery hoop so that it doesn't slip through once it's on the wall.  Trim off the excess material, and voila!


Hammer a nail in the wall, and hang the hoop from the little space under the tightening screw.
A nice little bit of color without having to sew!


Thursday, February 27, 2014

Burlap Monogrammed Wreath

Our front door needed a little pick-me-up, so I came across some easy wreath-making ideas on Pinterest that mashed together to personalize something for our home.
First, I started with the above materials: wreath form, wooden letter, scissors, marker, felt sheets, roll of teal chevron burlap (awesome Walmart find for less than $3!), hot glue gun, and circle templates
(pot lid & CD).
Snugly wrap the burlap around the wreath form, making sure to overlap the edges so the wreath form is completely covered.
Hot glue the end of the burlap down to the back of the wreath.
Next, start making the felt flowers by tracing and cutting out circles from the felt sheets.
Cut a spiral into the circle, starting from the edge and working your way to the middle.
Starting from the middle of the spiral, roll the felt around, tacking with glue every couple rolls, until you've rolled the entire spiral into a flower.
See how easy that was?  You can create different size flowers based on how big your circle is.
I decided to paint my wooden letter white, so I sprayed a coat of white as well as a coat of clear gloss to give it a more finished look.
Finally, arrange the letter and flowers on the wreath before hot gluing them down.
Be generous with the hot glue!
 
Ta da!  A little pop of color and personalization for less than $8  :)


Monday, February 24, 2014

Keys & Burlap

Note: This was the last blog entry at my old blog, A Day in the Life.  I just wanted to have this craft on the new site so I could document my burlap addiction all in one place :)

A few things to know before we begin...I am still trying to find cute and frugal ways to decorate my new house.  We moved in this past January, we're on a tight budget (well, at least I put myself on one after completing Financial Peace University), and I still don't have things decorated completely. I know it takes time, but I'm the type of person that thrives in organized, completed environments, so getting decor up is essential to my mental health.  Secondly, I am obsessed with burlap.  I am trying to not have it in EVERY single room of my house, but it is slowly creeping in.  Oh well.

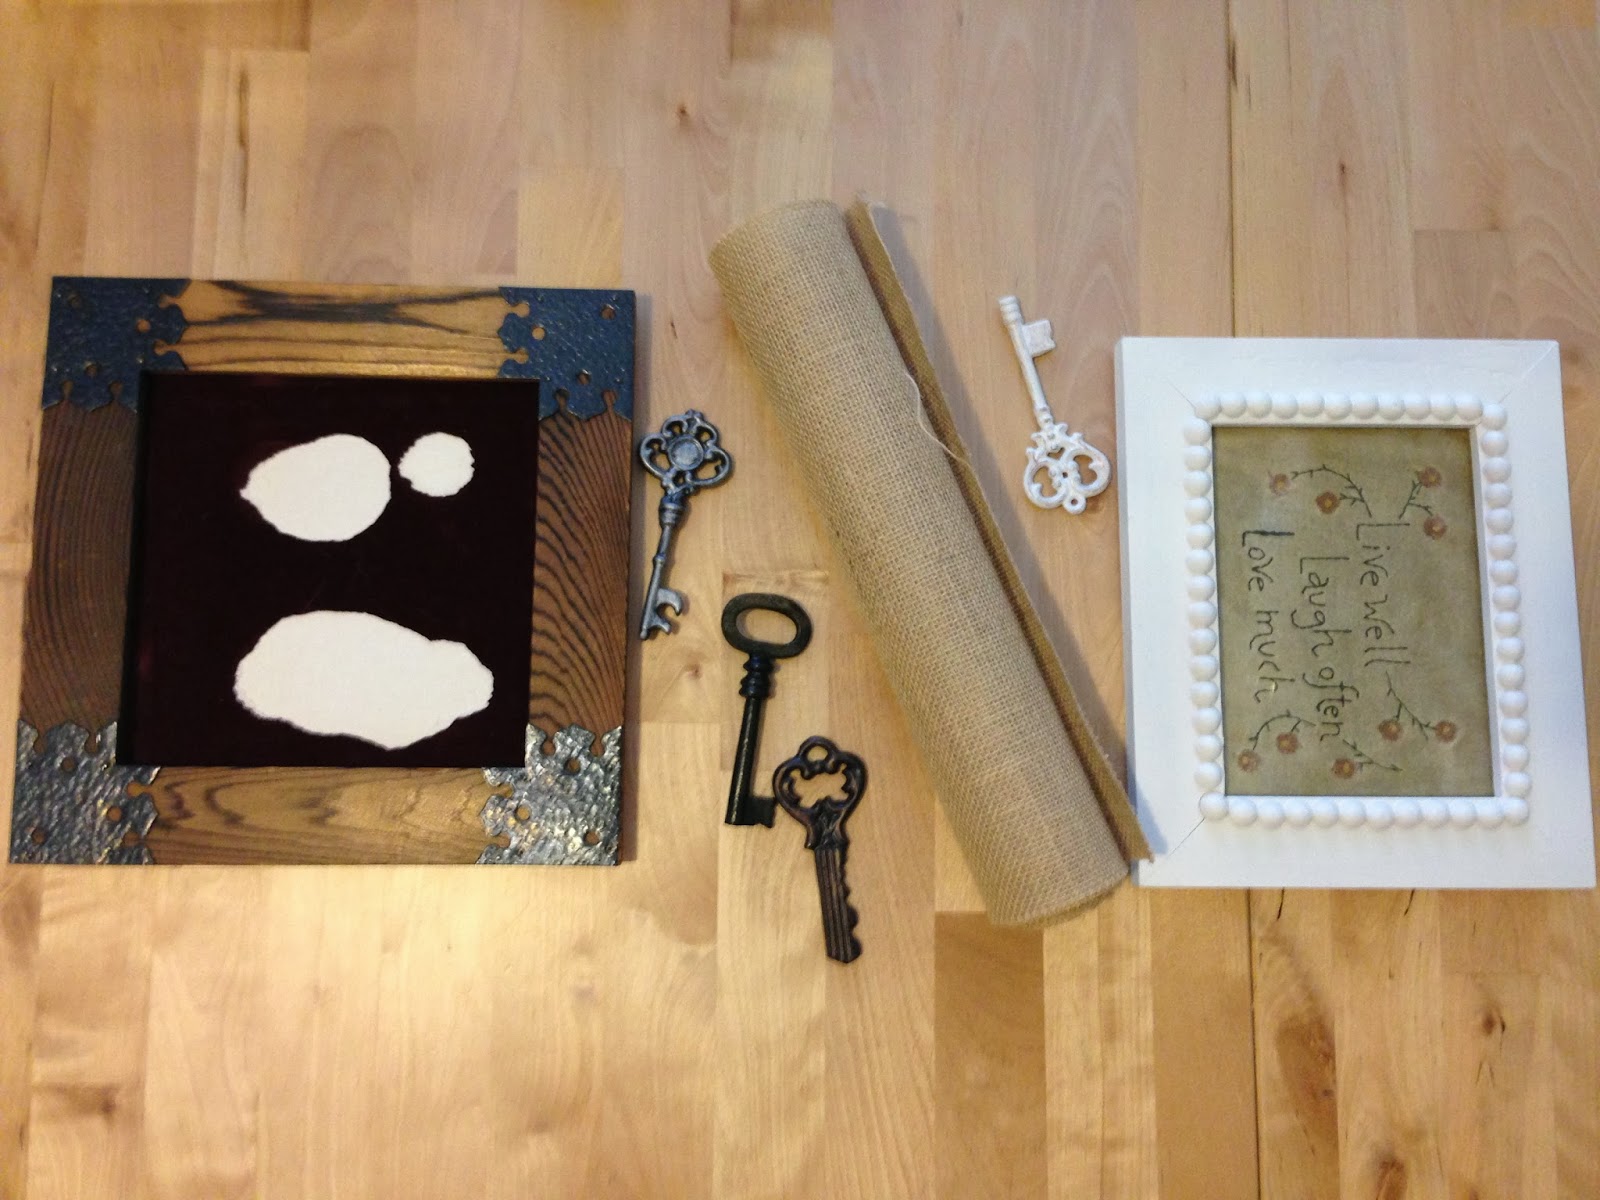
Brown frame from Goodwill: $1.99
Roll of laminated burlap from Michaels: $2.99
Four metal keys from Michaels: $4.00
White frame: Free (it was left in our house when we moved in)
1. Pop out the picture frame glass and whatever art is in it and find another use for it
2. Cut a piece of burlap to fit the opening of the frame and hot glue it to the picture frame backing
3. Hot glue the keys onto the burlap
4. Pop it all back in the frame

See how easy that was?!  So, for $8.98, I ended up with these finished products:


I found a place for the keys in our front room.  A big ole wall was calling out for a little more than what was already there, so I made a collage of a few pieces of wall art and mementos.  So happy with the result!  What do you think?  And I barely made a dent in the roll of burlap, so I have plenty left to infiltrate the rest of the house!